Bring Your Own IP Core
This tutorial introduces how to bring your own hard IP cores into a custom FPGA and use it during synthesis and place&route. The full script and source files can be found at examples/fpga/magic/hardpico, and an example application can be found at examples/app/picosoc/margic_hardpico.
Background
One of the greatest advantage of building a custom FPGA with PRGA is that it allows you to integrate specialized, hardened (vs. “soft”, i.e. implemented with LUTs) components. Similar to the DSP blocks commonly offered by commercial FPGAs, these hardened components offer great performance boost with minimal silicon area. When we know what applications we will run on the FPGA, we can identify commonly used kernels and harden them on our custom FPGA, such as neural network processing engines, specialized math accelerators, or I/O device controllers.
In this example, we will integrate a hard PicoRV32 core that implements the RISC-V ISA, specifically RV32IM, in our custom FPGA. Moreover, we will add negative-edge-triggered flipflops to enable the implementation of PicoSoC.
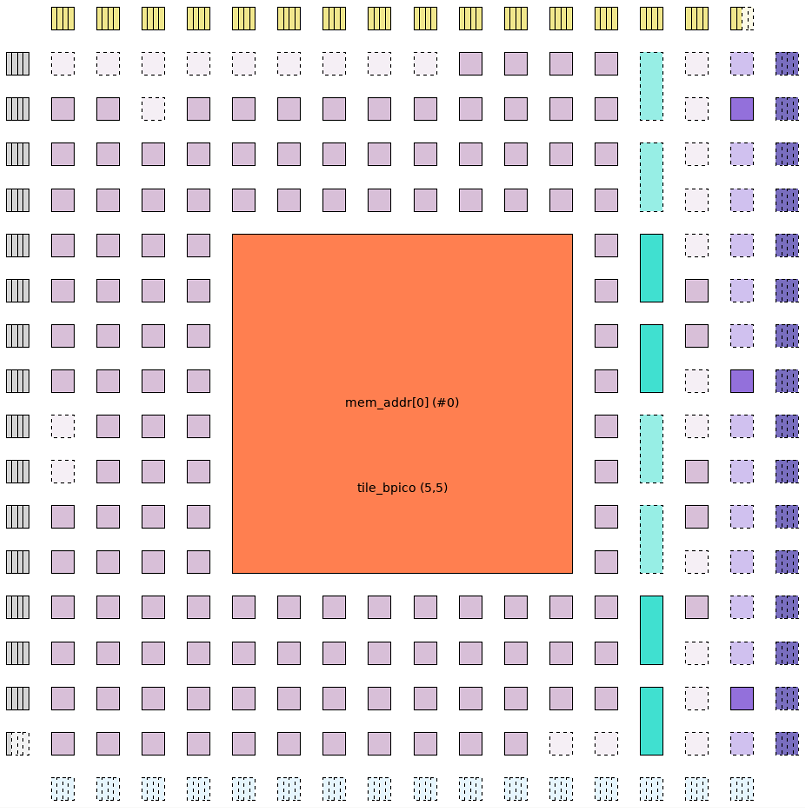
Figure created by VPR.
Describe custom primitives
As explained in the Logic Primitive section, all hard, indivisible components are categorized as Logic Primitive s in PRGA, and they can be used in an application in different ways. In this example, the PicoRV32 core will be available to an application through Explicit Instantiation, while the negative-edge-triggered flipflops will be also available through Technology Mapping.
Describe custom primitives: PicoRV32
Let’s first add the non-programmable primitive: PicoRV32. The source file can be found examples/fpga/magic/hardpico/src/picorv32.v.
To start building a new primitive, use the Context.build_primitive method.
Important arguments to this method include:
name: The name of the module in the Verilog source file.vpr_model: The name of the module in the abstract view. In this case, since the PicoRV32 core is not programmable, we can use the same Verilog module in both post-synthesis simulation and ASIC tapeout, thusvpr_modelshould be same asname.verilog_src: Path to the Verilog source file. The file won’t be copied over to the generated file directory when the path is an absolute path.
# ctx = Magic.new_context()

# -- picorv32 IP core --------------------------------------------------------
# start with the `ModuleView.abstract` view
builder = ctx.build_primitive(name = "picorv32",
        vpr_model = "picorv32",

        # Use absolute path here, so the file is not copied into our generated RTL directory
        verilog_src = os.path.join(os.path.abspath(os.path.dirname(__file__)), "src/picorv32.v"))
After creating the primitive, we need to tell PRGA about the ports of the primitive. Note that we don’t need to add the ports that we won’t be using.
# only create used ports
#                                   name,        width
clk         = builder.create_clock ("clk")
resetn      = builder.create_input ("resetn",    1)
mem_valid   = builder.create_output("mem_valid", 1)
mem_instr   = builder.create_output("mem_instr", 1)
mem_ready   = builder.create_input ("mem_ready", 1)
mem_addr    = builder.create_output("mem_addr",  32)
mem_wdata   = builder.create_output("mem_wdata", 32)
mem_wstrb   = builder.create_output("mem_wstrb", 4)
mem_rdata   = builder.create_input ("mem_rdata", 32)
irq         = builder.create_input ("irq",       32)
To make sure proper timing information is included in the generated VPR specifications, we should also annotate timing arcs between the ports we created. Currently, PRGA supports the following types of timing arcs:
"comb_bitwise": Bitwise combinational paths, e.g. from the input of an inverter to the output. In this case, the “source” of the timing arc must be an input port, and the “sink” of the timing arc must be an output port. The “source” and the “sink” must also be of the same width."comb_matrix": Matrix combinational paths. Mostly the same as the"comb_bitwise", except that the “source” and the “sink” could be of different widths."seq_start": Sequential startpoint, e.g. the output of a flipflop. In this case, the “source” of the timing arc must be a clock, while the “sink” of the timing arc may be an input port or an output port."seq_end": Sequential endpoint, e.g. the input of a flipflop. Similar to a sequential startpoint, the “source” must be a clock, while the “sink” may be an input port or an output port.
# timing arcs
#                         type,          source, sink
builder.create_timing_arc("seq_end",     clk,    resetn)
builder.create_timing_arc("seq_start",   clk,    mem_valid)
builder.create_timing_arc("seq_start",   clk,    mem_instr)
builder.create_timing_arc("seq_end",     clk,    mem_ready)
builder.create_timing_arc("seq_start",   clk,    mem_addr)
builder.create_timing_arc("seq_start",   clk,    mem_wdata)
builder.create_timing_arc("seq_start",   clk,    mem_wstrb)
builder.create_timing_arc("seq_end",     clk,    mem_rdata)
builder.create_timing_arc("seq_end",     clk,    irq)
After specifying the ports and timing arcs, we are done describing the abstract view. As explained above, for non-programmable primitives, we can use the same Verilog file for both post-synthesis simulation and ASIC tapeout, which means we can use the same Verilog file for the design view. PRGA provides a handy method to do so, saving you from specifying the ports again.
# Commit the abstract view, and then automatically create the design view
builder = builder.build_design_view_counterpart(
        # Use absolute path here, so the file is not copied into our generated RTL directory
        verilog_src = os.path.join(os.path.abspath(os.path.dirname(__file__)), "src/picorv32.v"))

# Commit the design view
builder.commit()
Describe custom primitives: Negedge-triggered D-Flipflop
Negedge-triggered D-Flipflops are also non-programmable primitives, so we can add it to PRGA similar to how we added the PicoRV32 core. In addition, we want the synthesis tool to automatially use these D-flipflops without us explicitly instantiating them in our application. That is, the following application Verilog should be mapped to our negedge-triggered D-flipflops automatically:
reg [3:0] something, something_next;
always @(negedge clk) begin
    something <= something_next;
end
This is enabled by providing PRGA a proper technology mapping file to use during
synthesis.
The file can be found at
examples/fpga/magic/hardpico/src/dffn.techmap.tmpl.v.
For more information on the format and syntax of the technology mapping file,
check out Yosys ‘s documentation on the techmap command.
To make PRGA aware of this technology mapping file, use the techmap_template
and techmap_order arguments to the Context.build_primitive method.
Note that we are using relative path for the techmap_template argument here,
which requires us to add the directory to our template search path later.
# -- negedge DFF ------------------------------------------------------------
builder = ctx.build_primitive("dffn",
        vpr_model = "dffn",

        # Use absolute path here, so the file is not copied into our generated RTL directory
        verilog_src = os.path.join(os.path.abspath(os.path.dirname(__file__)), "src/dffn.v"),
        techmap_template = "dffn.techmap.tmpl.v",
        techmap_order = -1.,    # techmap `dffn` after LUT mapping
        )

# ports
clk = builder.create_clock ("clk")
D   = builder.create_input ("D", 1)
Q   = builder.create_output("Q", 1)

# timing arcs
builder.create_timing_arc(TimingArcType.seq_end,   clk, D)
builder.create_timing_arc(TimingArcType.seq_start, clk, Q)

# design view
builder = builder.build_design_view_counterpart(
        # Use absolute path here, so the file is not copied into our generated RTL directory
        verilog_src = os.path.join(os.path.abspath(os.path.dirname(__file__)), "src/dffn.v"))
builder.commit()
Build blocks with the custom primitives
After adding the custom primitives, we can use them to build block s. It is mostly similar to how we did it in the Describe the architecture section. However, there is one scary line in the examples/fpga/magic/hardpico/build.py script that deserves some explanation, specifically, line 180 - 198:
# -- Pico Core Block ---------------------------------------------------------
# Hard pico core: takes 8x8 tiles, no routing tracks over it
#                               name,    width, height
builder = ctx.build_logic_block("bpico", 8,     8)

#                          model,                      instance name
inst = builder.instantiate(ctx.primitives["picorv32"], "i_core",
        translate_attrs = {
            "verilog_parameters":  {
                "BARREL_SHIFTER":   1,
                "COMPRESSED_ISA":   1,
                "ENABLE_MUL":       1,
                "ENABLE_DIV":       1,
                "ENABLE_COUNTERS":  1,
                "ENABLE_IRQ":       1,
                "ENABLE_IRQ_QREGS": 1,
                "STACKADDR":        1024,
                "PROGADDR_RESET":   "32'h0010_0000",
                "PROGADDR_IRQ":     "32'h0000_0000",
                },
            },
        )
First of all, as a reminder, the code above is building the block in the
abstract view.
The extra argument to the builder.instantiate(...) function call,
translate_attrs, is a keyword-only argument of type dict,
specifying attributes that should be added to that instance in the
design view during
Translation, i.e., when PRGA
generates the design
view based on the
abstract view.
In this case, the generated
design view will have attribute
verilog_parameters with the value {"BARREL_SHIFTER": 1, "COMPRESSED_ISA":
1, ...}.
The verilog_parameters attribute of an instance in the
design view
affects RTL generation.
It adds the specified parameters to the instance.
In this case, the generated RTL for the bpico block will look like the
following:
module bpico (...);
    ...

    picorv32 #(
        .BARREL_SHIFTER     (1)
        ,.COMPRESSED_ISA    (1)
        ,.ENABLE_MUL        (1)
        ,.ENABLE_DIV        (1)
        ,.ENABLE_COUNTERS   (1)
        ,.ENABLE_IRQ        (1)
        ,.ENABLE_IRQ_QREGS  (1)
        ,.STACKADDR         (1024)
        ,.PROGADDR_RESET    (32'h0010_0000)
        ,.PROGADDR_IRQ      (32'h0000_0000)
    ) i_core (
        ...
        );

    ...
endmodule
The motivation of this is to match how PicoRV32 is used in the application to what is physically on the FPGA. Remember that the modules and instances in the design view are eventually implemented on silicon with transistors. Parameterization in the design view determines what is actually implemented, and once implemented, cannot be changed anymore. This is COMPLETELY DIFFERENT from parameterization in the application, which, if supported by the logic primitives support, can be emulated with different modes of the same PROGRAMMABLE primitive.
Add directories to file rendering template search paths
In this example, the two Verilog files (picorv32.v and dffn.v) are added
via absolute paths and won’t go through the rendering process.
Therefore, we don’t need to add them to our search path.
However, the technology mapping template (dffn.techmap.tmpl.v) must be
accessible to the file renderer.
To add the directory that contains the template to the search path, we simply
need to pass it to the *.new_renderer() function call.
The path is relative to the script itself.
Flow(
    Translation(),
    SwitchPathAnnotation(),
    Magic.InsertProgCircuitry(),
    VPRArchGeneration('vpr/arch.xml'),
    VPR_RRG_Generation('vpr/rrg.xml'),
    VerilogCollection('rtl'),
    YosysScriptsCollection('syn'),
    ).run(ctx,
        # add `src` into file rendering template search path
        Magic.new_renderer(["src"])
    )